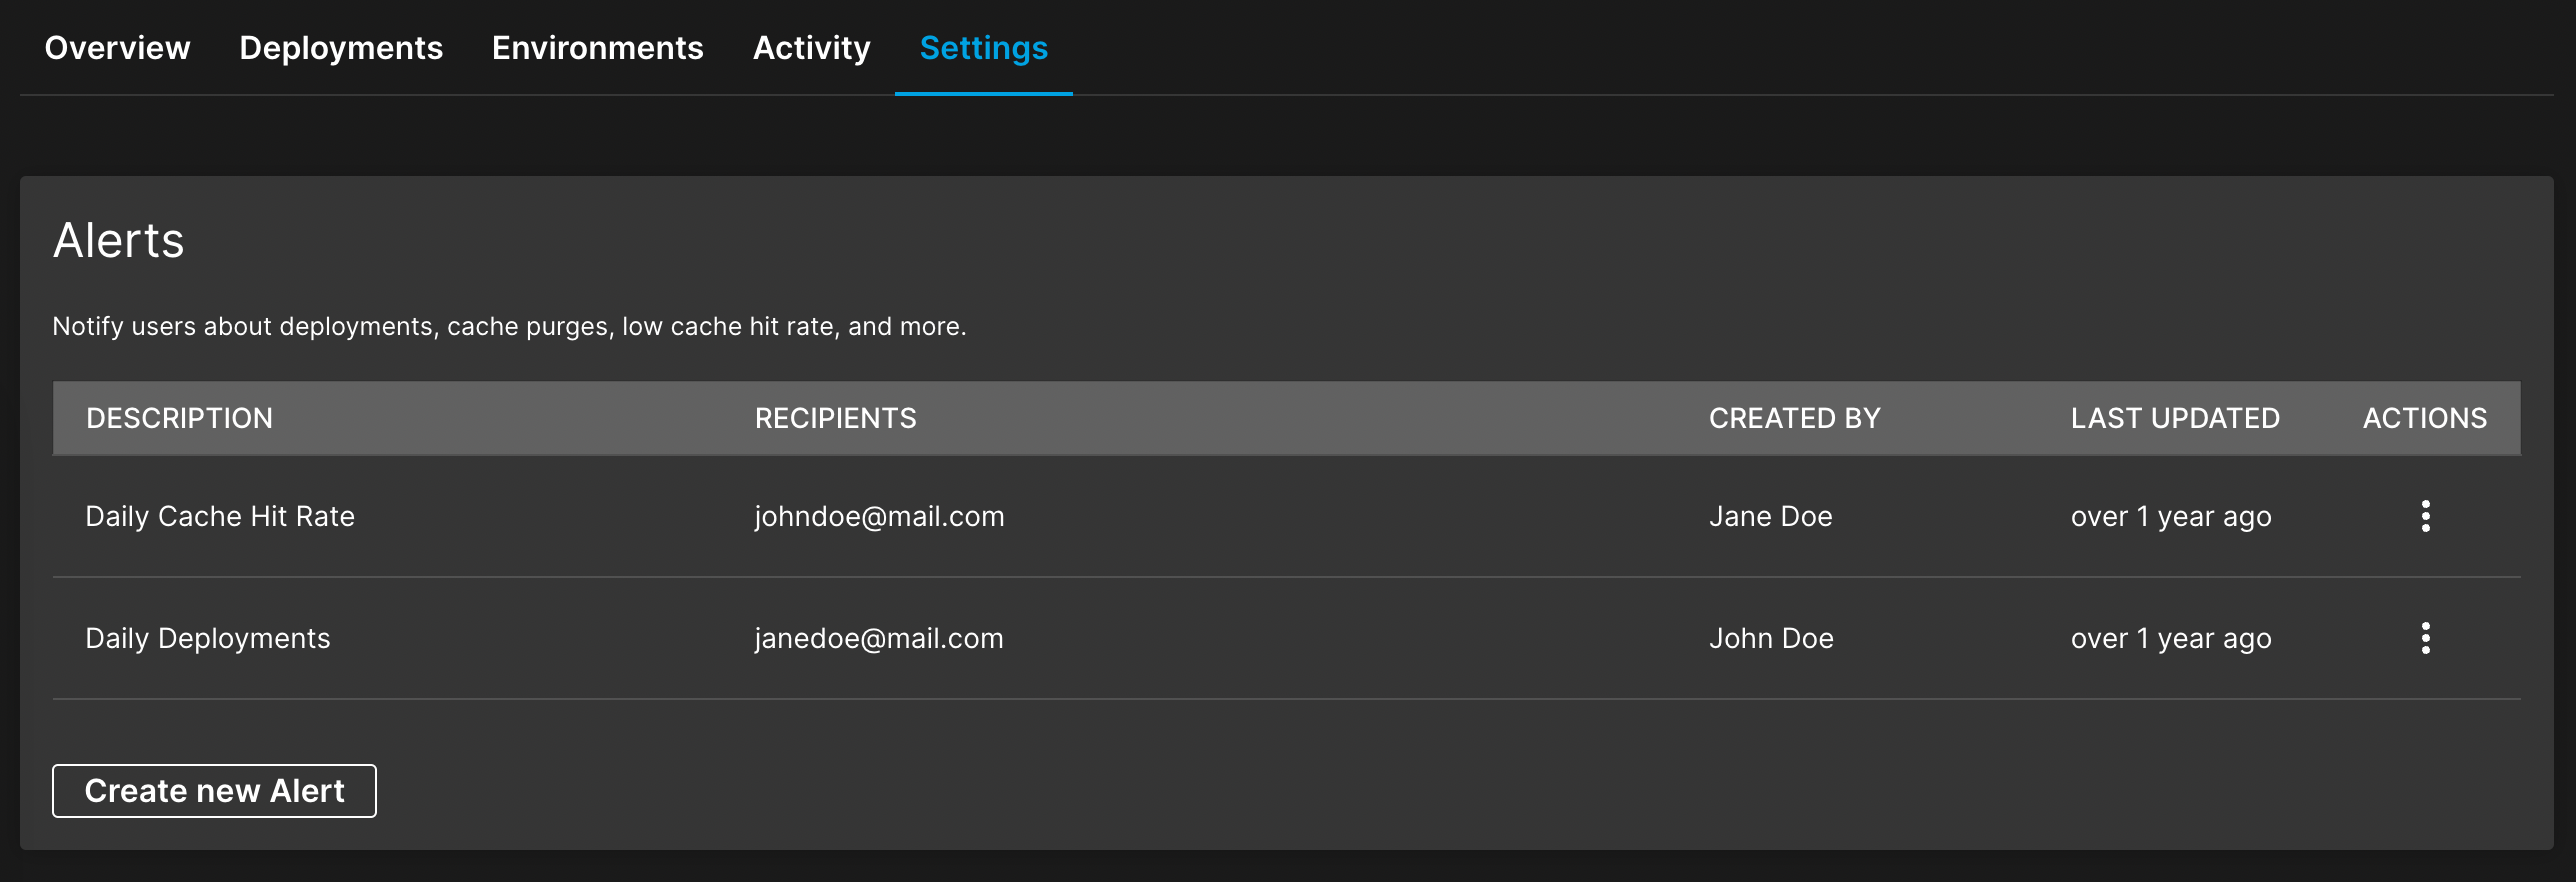
Alerts are a way to get notified of certain activities in your project. This gives you the opportunity to act on issues or errors, or keep up to date with the ongoings in your project.
There are certain alert types that can be configured with their corresponding fields.
Alert Types and Fields

| Field Name | Description |
|---|---|
| Alert Type | Deployments: Get notified when deployments succeed or fail. Core Web Vitals: Select a list of domains to receive alerts for their Core Web Vital status. Cache Hit Rate: Receive alerts on the general percentage of your project’s Cache Hit Rate or optionally when it falls below a certain percentage threshold. Cache Purges: Be alerted when resources are removed from the cache. |
| Frequency | The time interval or how often to notify the selected recipient(s) |
| Environments | The environment(s) to receive alerts for. This option only apply to the Deployments, Cache Hit Rate, and Cache Purges alert types. |
| Recipients | The recipient(s) of the alert. At least one recipient needs to be selected. |
| Domains | Core Web Vitals alert type that describes the domain(s) to receive alerts for. |
| Maximum Threshold | The Cache Hit Rate alert type that specifies the maximum threshold to receive alerts for. |
Create an alert
To create an alert:
- Go to the alerts section of your site’s settings.
- Click Create new Alert.
- Fill the form fields to configure the alert.
- Click Create Alert to save your configuration.

Edit an alert
To edit an alert:
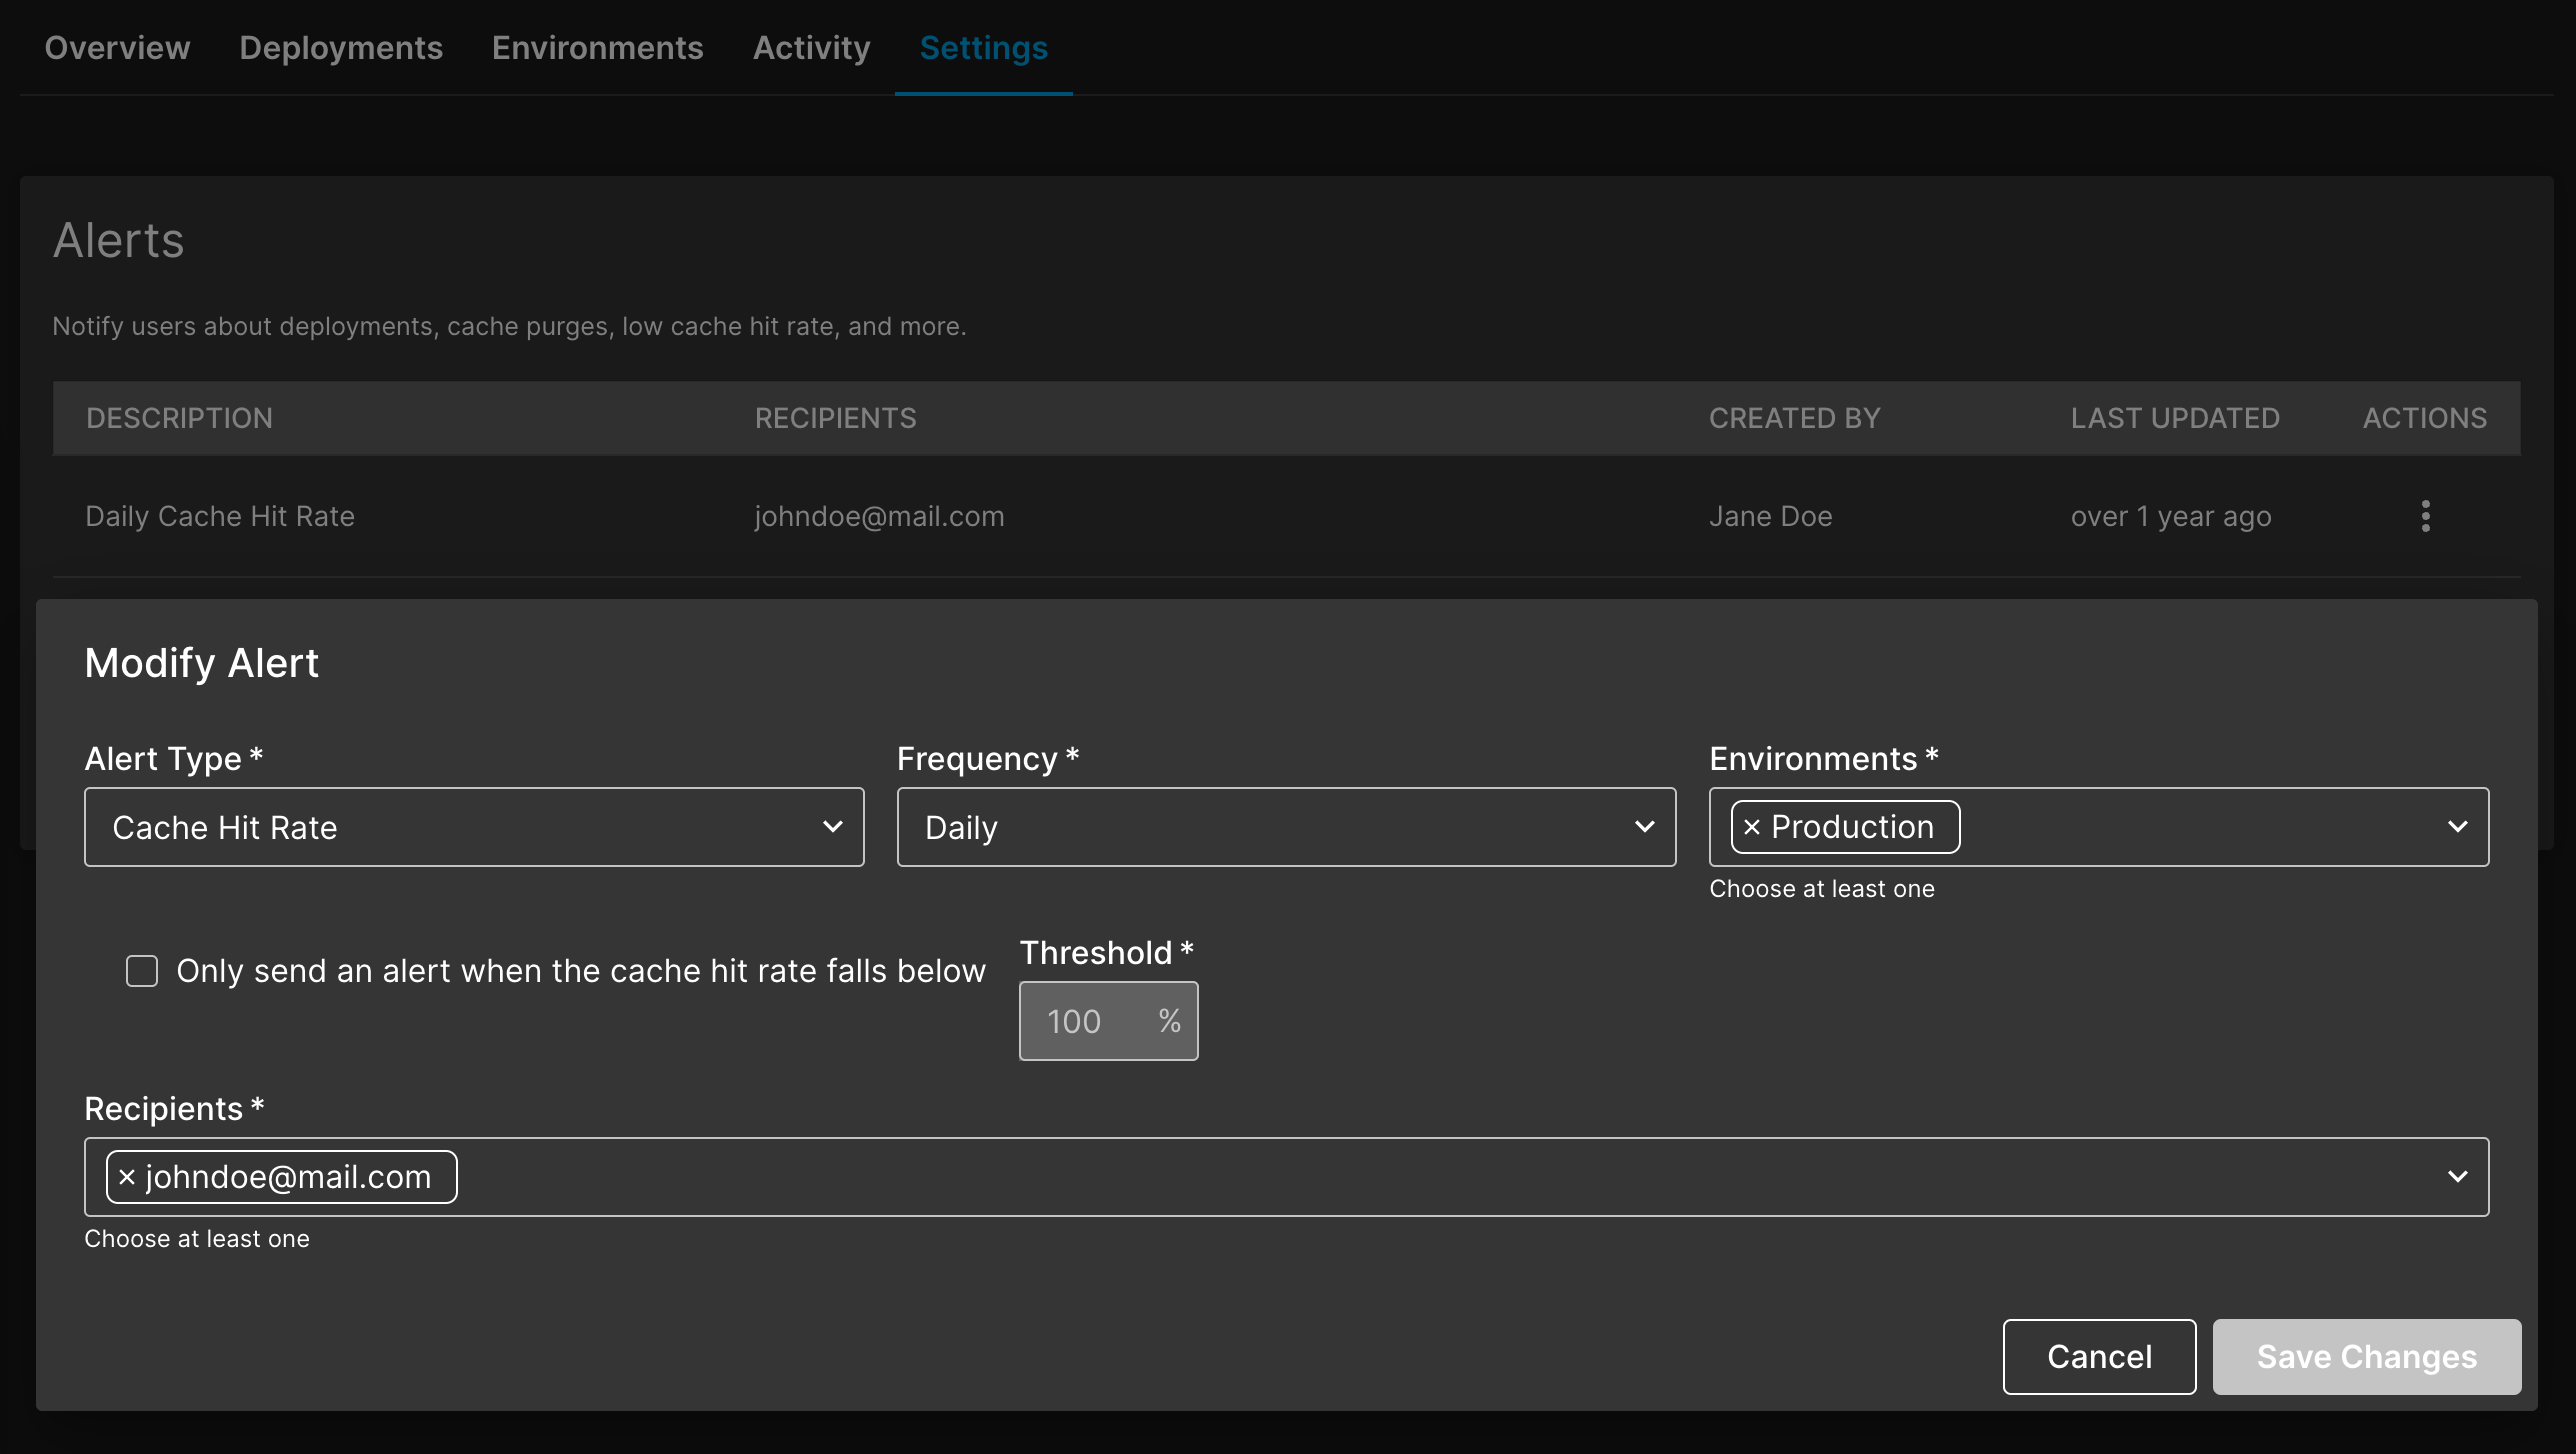
- Go to the alerts section of your site’s settings.
- Find the alert you want to edit then click on it to edit.
- Make your desired changes to the alert.
- Click Save Changes.

Disable an alert
To disable an alert:
- Go to the alerts section of your site’s settings.
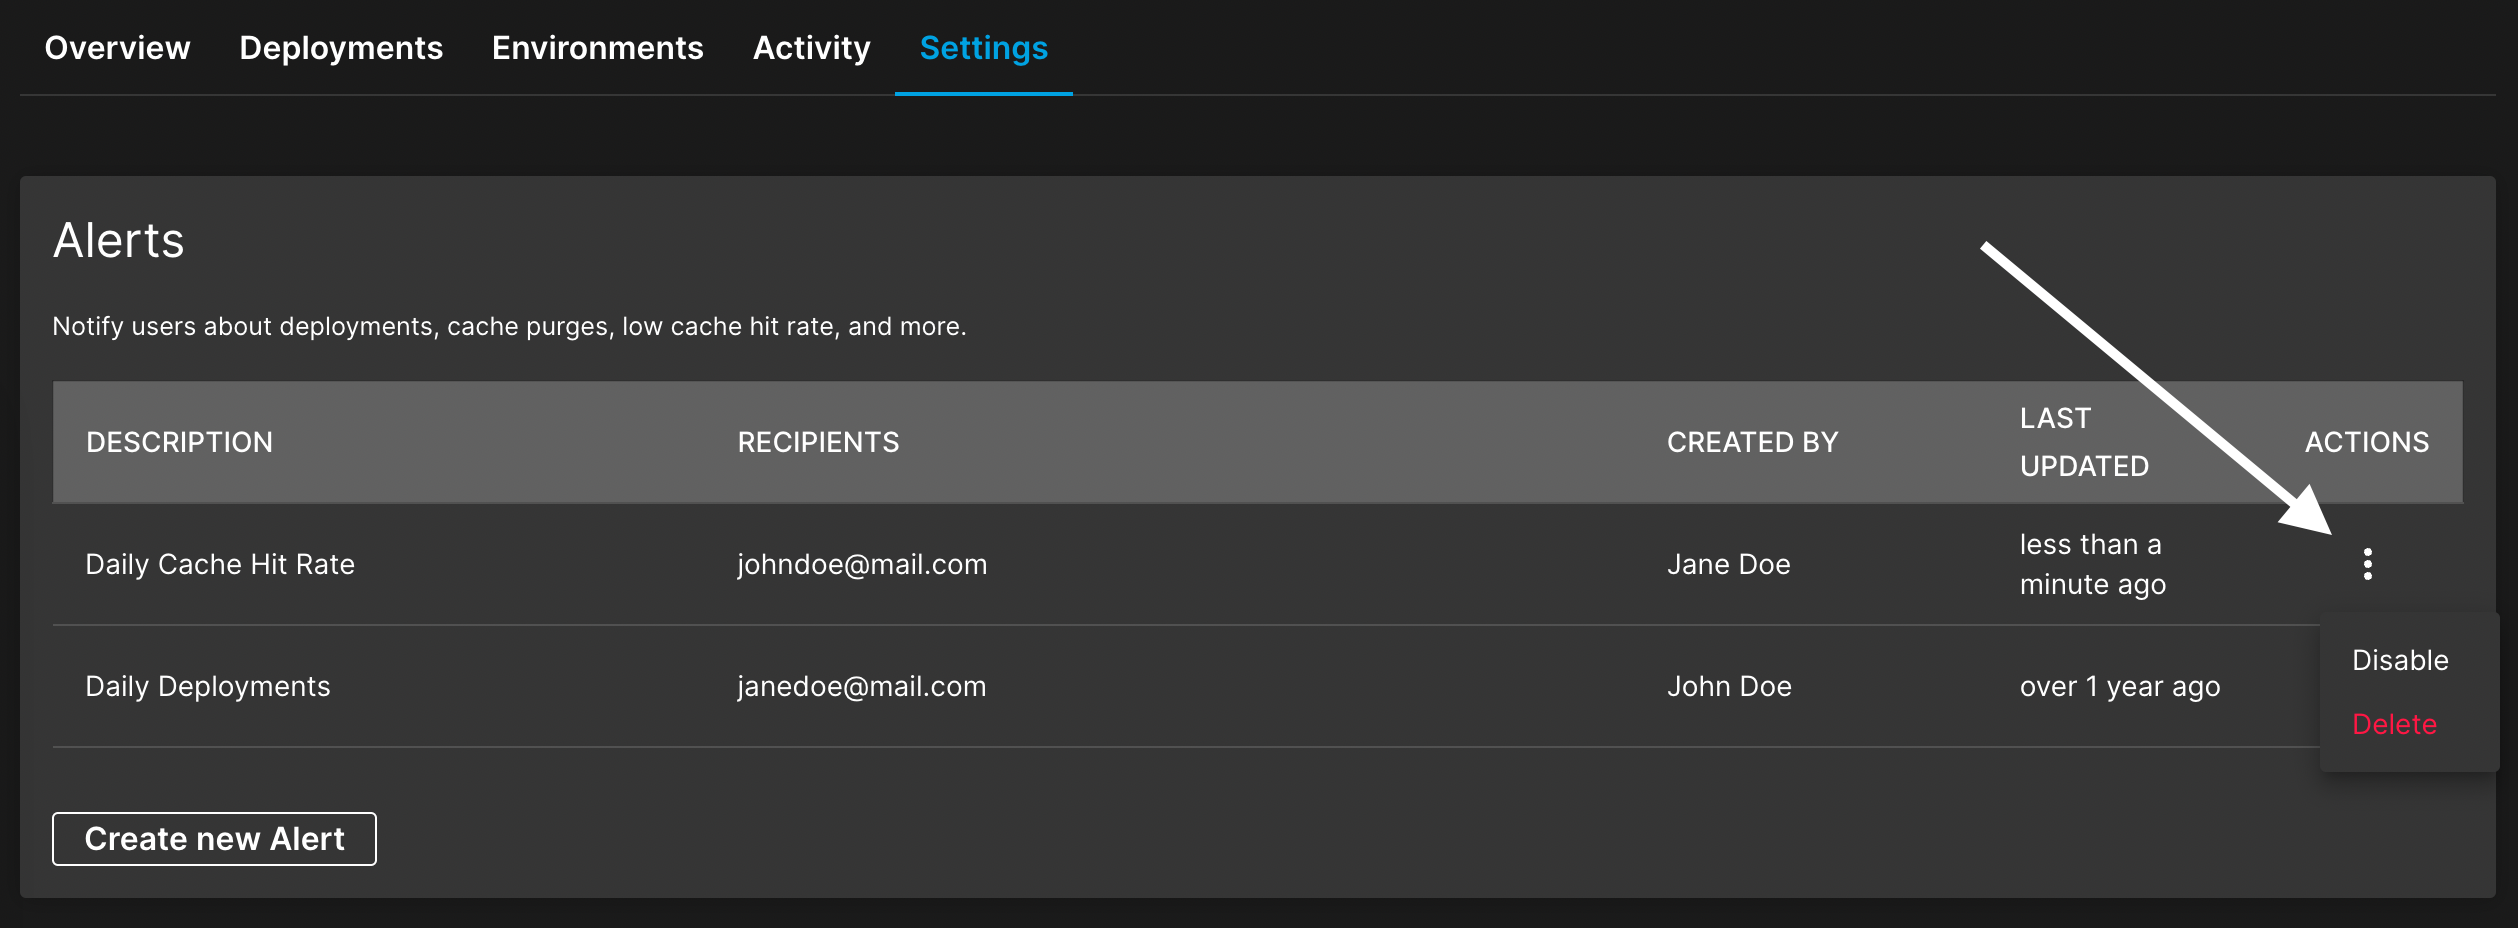
- Click on the icon in the ACTIONS column.
- Click on Disable.

Delete an alert
To delete an alert:
- Go to the alerts section of your site’s settings.
- Click on the icon in the ACTIONS column.
- Click on Delete.

Enable a disabled alert
To enable a disabled alert:
- Go to the alerts section of your site’s settings.
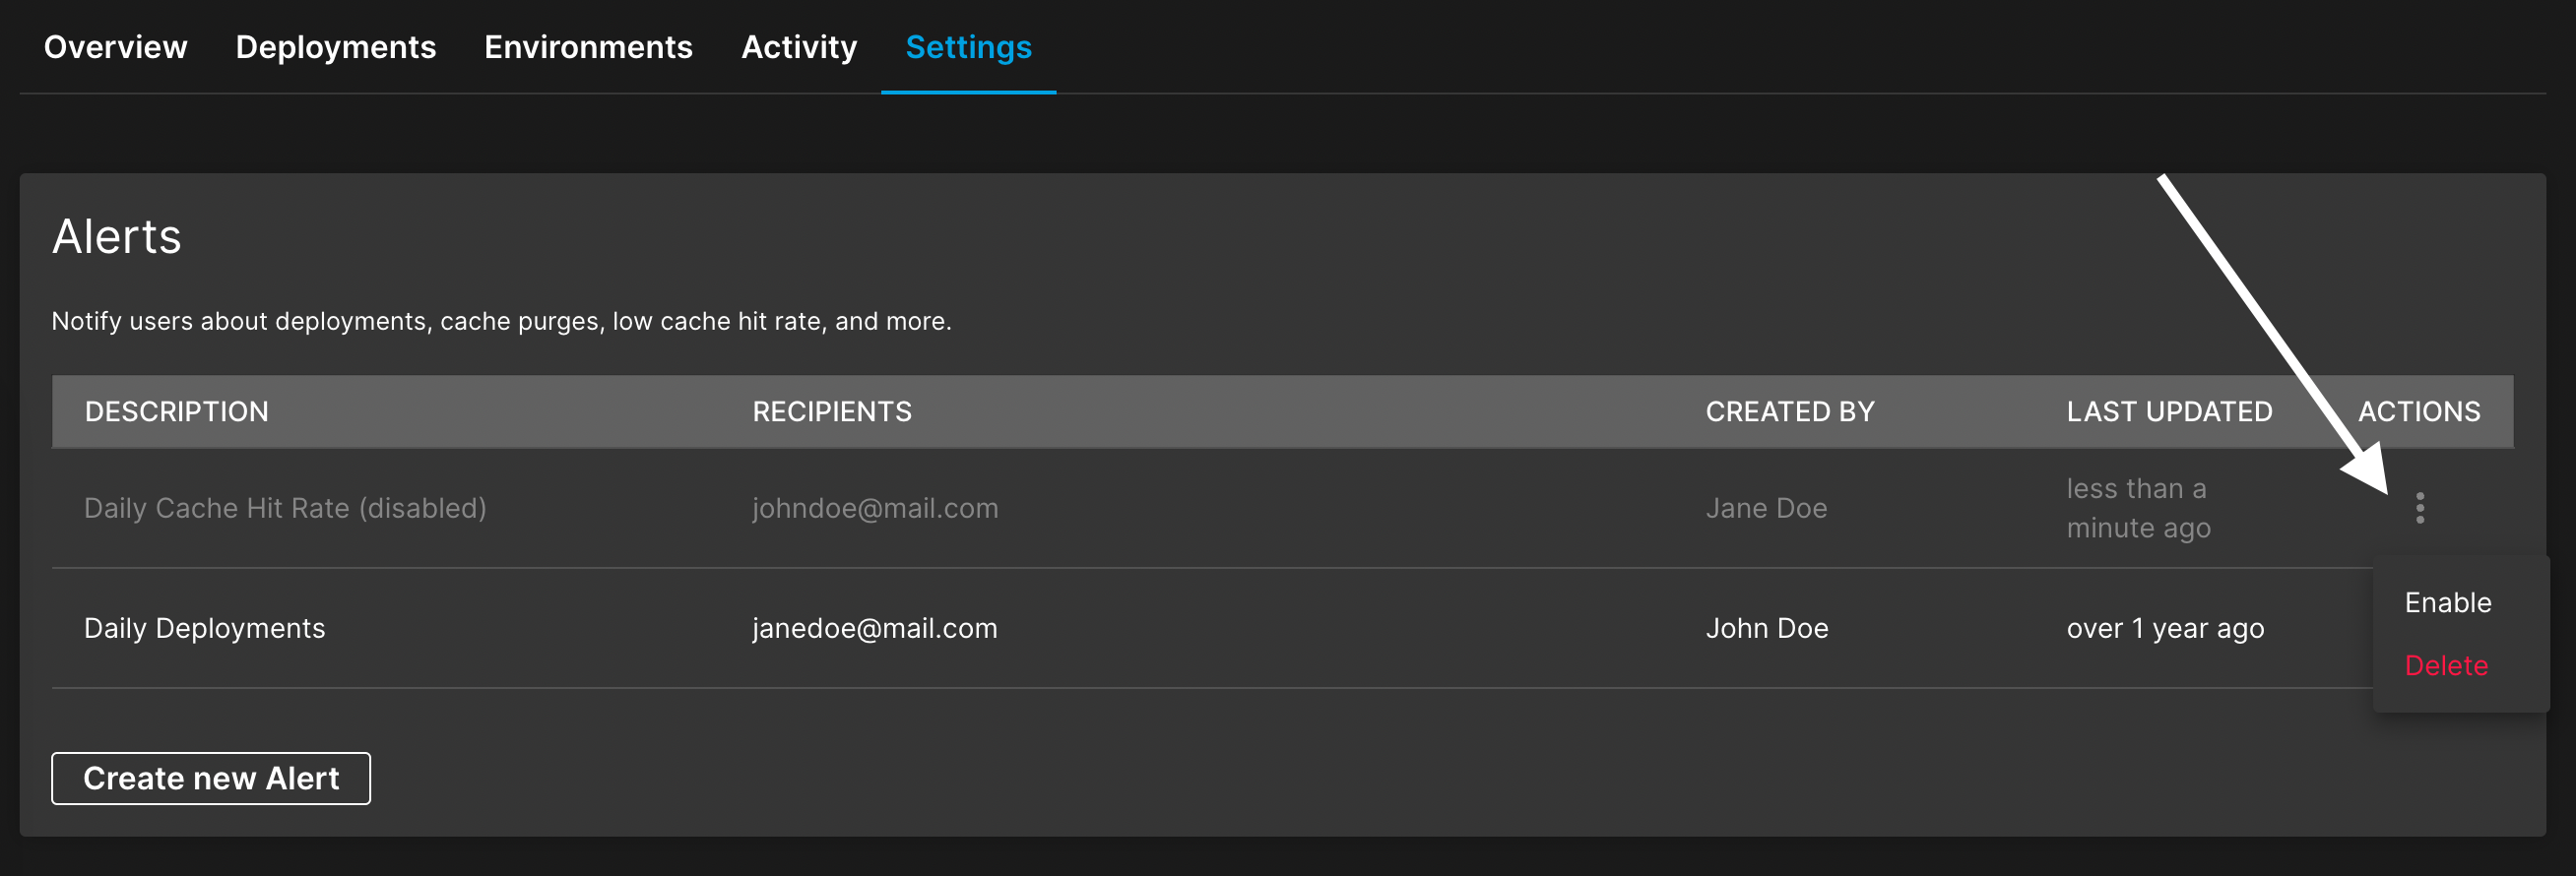
- Click on the icon in the ACTIONS column.
- Click on Enable.


