


A property instructs Edgio how to securely process requests for your website. Setting up a property typically involves:
- Determining whether it will belong to a team space that allows collaboration with other team members or a private space with access restricted to your account.
- Environment(s). An environment allows you to serve your site on different domains.
- TLS certificate(s). Each hostname associated with an environment requires the installation of a TLS certificate on our network. Manage these TLS certificates through your property’s settings.
- Securing your web applications and API traffic. Secure your web applications and APIs across all environments using a single configuration at the property level.
Managing Properties
You may create, rename, or delete a property. You may even transfer ownership to a different team.
The administration of a property that lives within a team space requires the Admin role for that team.
Upon creating a property, it will contain a production environment with the following configuration:
- Hostname: Identifies a hostname through which your site will be served. Requests submitted by clients are directed to this hostname.
- Origin Configuration: Defines how Edgio communicates with your web server(s).
By default, hostname(s) defined during property creation are assigned to the first origin configuration. Once you have added multiple origin configurations, you may adjust this mapping as needed.
To create a property
-
From the Edgio Developer console, determine where you will create a property.
-
Private Space: By default, the Edgio Developer console loads your private space. Access to a property created in your private space is restricted to your account. Proceed to the next step.
-
Team Space: Load the desired team by clicking the
 icon that appears next to your name and then selecting the desired team.
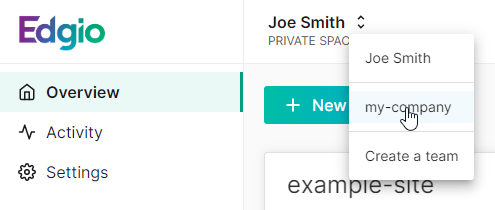
-
-
Click + New Property.
-
In the Property Name option, assign a unique name to this property.
-
Add one or more hostname(s) through which your site will be delivered.
- From the Hostnames section, click + Add Hostname.
- Type the desired hostname (e.g.,
www.example.com). - Repeat steps 1 and 2 as needed.
-
Add one or more origin configuration(s). An origin configuration identifies your web servers and defines how Edgio proxies cache misses to them.
By default, a new property contains an origin configuration called
webthat requires configuration.-
From the Name option, assign it a name.
-
From the Origin Hostname option, define a hostname or an IP address that points to your web server(s).
-
Optional. If your web servers are listening on a custom port, then you will need to define it within the Port option.
-
From the Scheme option, determine whether Edgio will communicate with your web server(s) using HTTP, HTTPS, or whether we will match the scheme used by the client.
-
Optional. By default, the request determines the value assigned to the
Hostrequest header. You may override the value assigned to this request header through the Override Host Header option. -
Optional. Define the TLS requirements when communicating with your web servers through the Origin TLS Settings section.
-
Add more origin configurations as needed by clicking + Add Origin and then repeating the above steps.
-
-
Click Create Property.
To rename a property
- From the Edgio Developer console, click on the desired property.
- Click Settings.
- From the Rename property “<PROPERTY>” section, set the New Name option to the desired name.
- Click Save.
To delete a property
- From the Edgio Developer console, click on the desired property.
- Click Settings.
- From the Delete property section, mark the Confirm that I want to delete the property “<PROPERTY>“. option.
- Click Delete Property.
To transfer ownership to another team
- From the Edgio Developer console, click on the desired property.
- Click Settings.
- From the Move property to another team section, select the desired team.
- Click Save.