


Optimize your WordPress website’s performance and security with Edgio. Proxying traffic through our global network reduces latency and enhances the delivery of your website content. With our free WordPress plugin, you can manage cached website content directly from your control panel. Additionally, Edgio offers advanced performance enhancements such as Predictive Prefetching for an even better user experience. Upgrade your website’s performance today with Edgio!
What is WordPress?
WordPress is a content management system (CMS) that allows you to host and build websites. WordPress contains plugin architecture and a template system, so you can customize any website to fit your business, blog, portfolio, or online store.
System Requirements
Sign up for Edgio
Deploying requires an account on Edgio. Sign up here for free.
Install the Edgio CLI
If you have not already done so, install the Edgio CLI.
1npm i -g @edgio/cli
Getting Started
Create a new WordPress site
If you don’t already have a WordPress site, create one by following the official WordPress.com guide. You may also use other WordPress providers, but setup instructions may differ.
Create via Edgio Developer console
- First, login to the Developer Console and locate the New Site button.

- Next, enter your WordPress site’s domain name. This will eventually become the origin backend that you will proxy to once your site is setup.
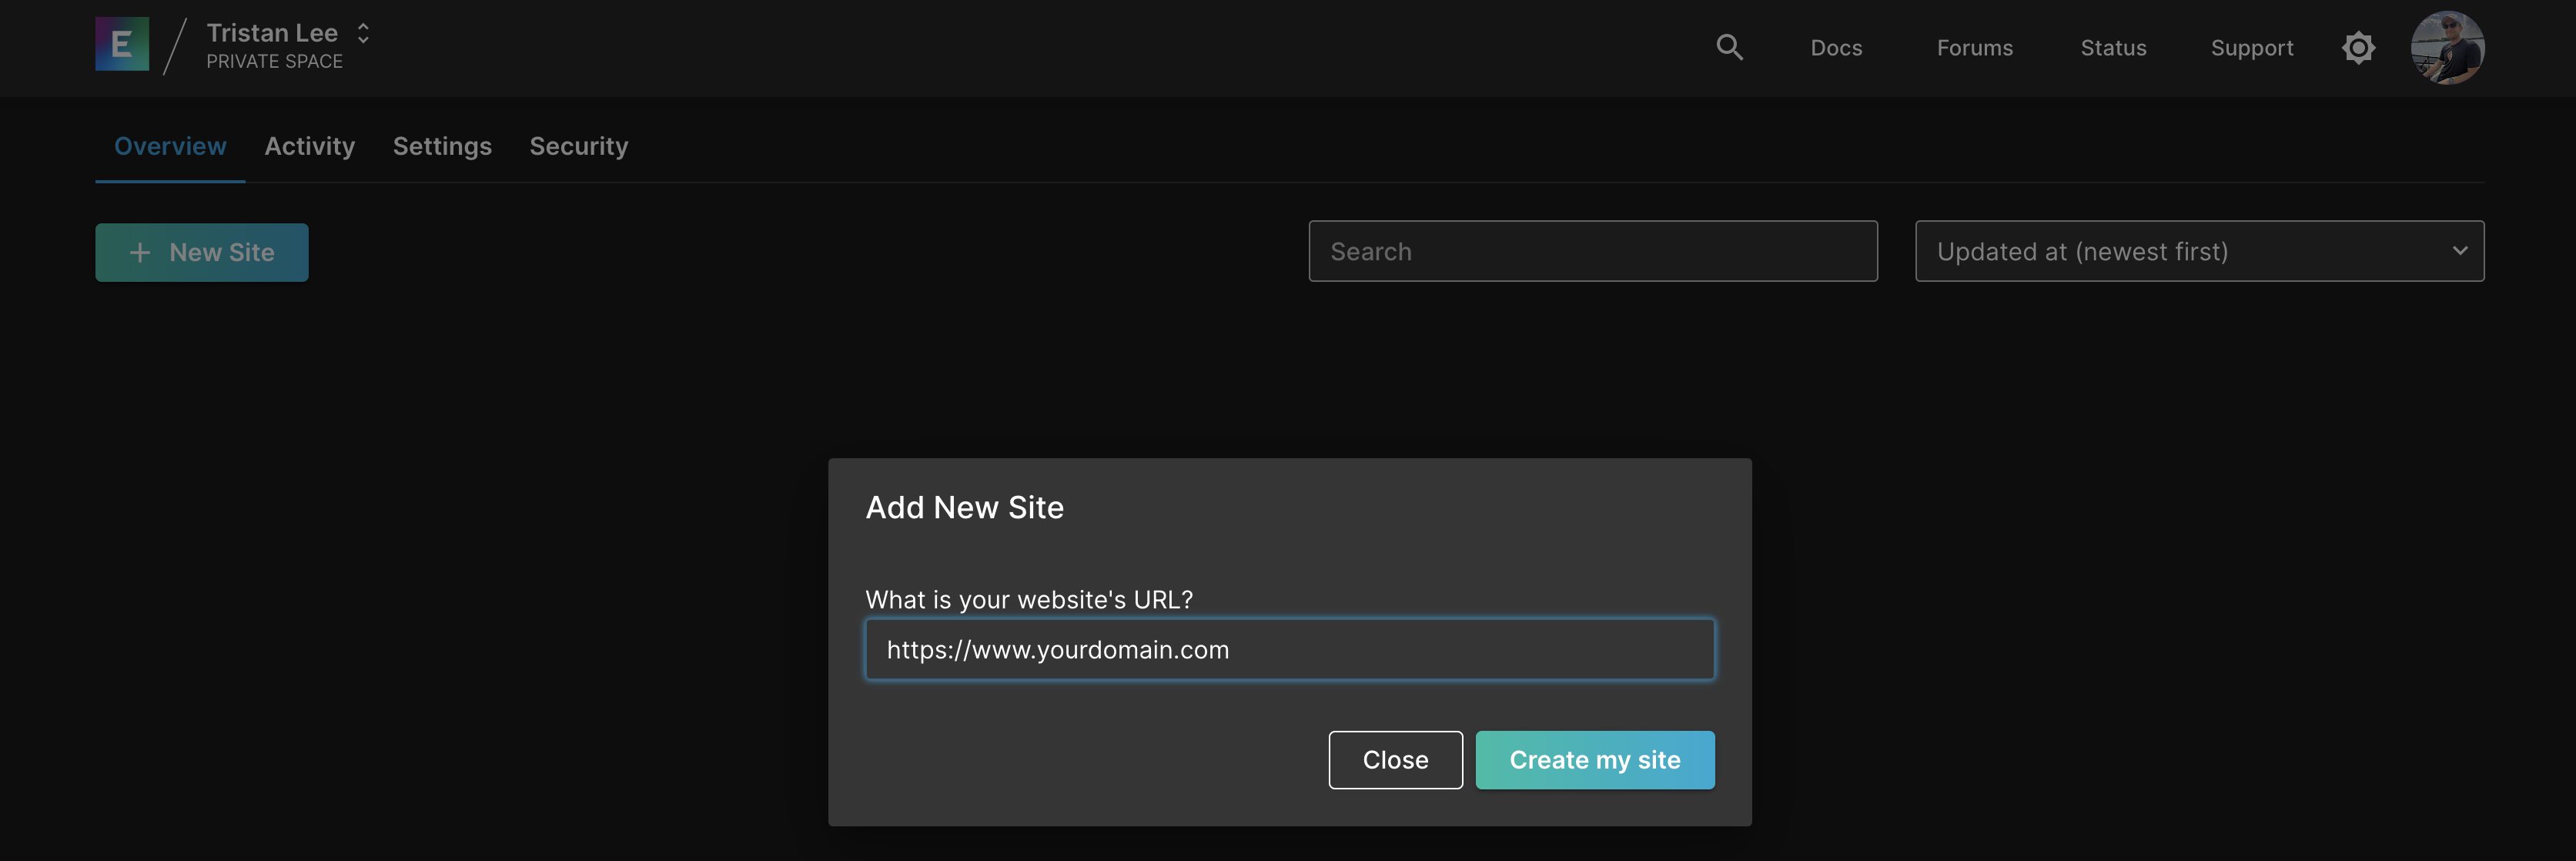
- Once your site is created, copy the generated command into your terminal (💻) and run it at the root of your project. This will initialize your project source code with Edgio and automatically deploy your site. If you do not have your WordPress source code locally, choose the Create a new directory option from the CLI.
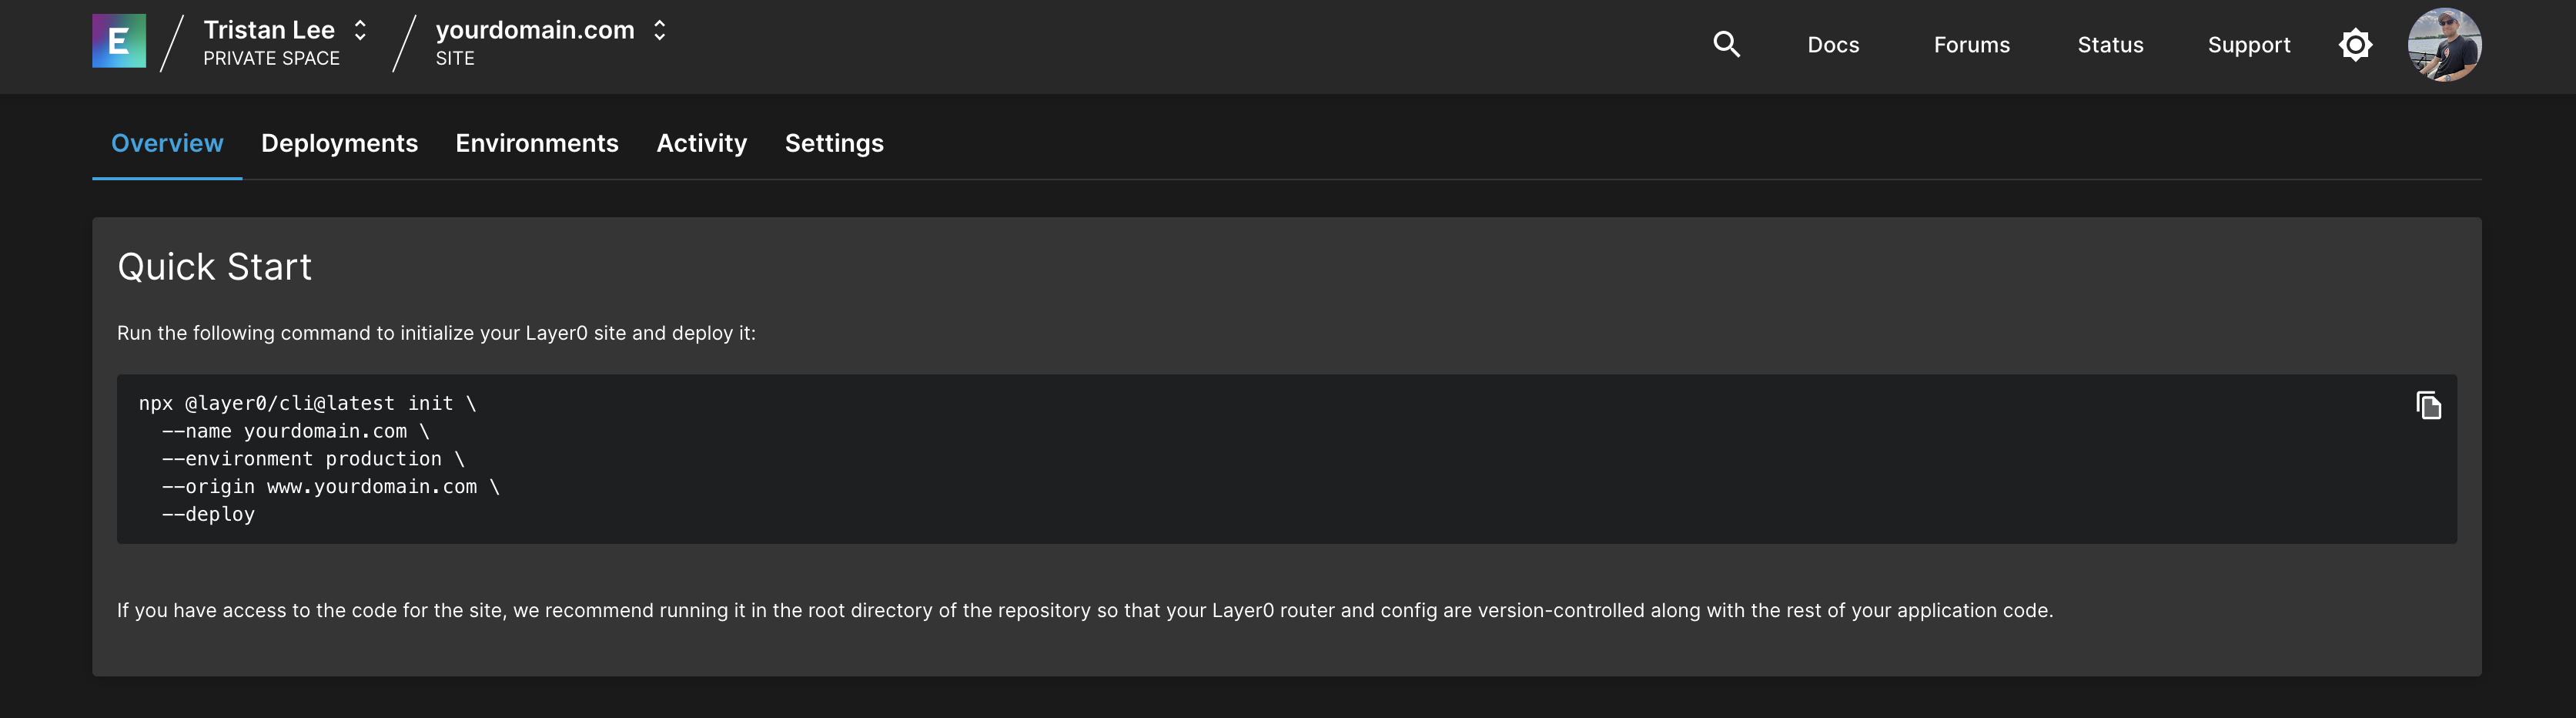
An example command for www.yourdomain.com:
1npx @edgio/cli@latest init \2 --name yourdomain.com \3 --environment production \4 --origin www.yourdomain.com \5 --deploy
- Finally, you can start to update your Edgio router (
routes.js) and configuration file (edgio.config.js) to proxy your origin and setup caching rules.
Run the WordPress app locally on Edgio
Test your app with the Sites on your local machine by running the following command in your project’s root directory:
1edgio dev
Load the site http://127.0.0.1:3000
Deploying
Create a production build of your app by running the following in your project’s root directory:
1edgio build
Deploy your app to the Sites by running the following command in your project’s root directory:
1edgio deploy
Refer to the Deployments guide for more information on the deploy command and its options.
Direct Traffic to Sites
Once you have confirmed that your deployed Edgio site is proxying content from your hosted WordPress site, you may go back to your site in the Developer Console and follow the instructions on configuring your production DNS to point to Edgio. Refer to the Custom Domains and SSL guide for additional details.
WordPress Plugin
Edgio provides a WordPress plugin you may leverage to set cache TTL and automatically clear the Edgio cache when a change is made to your site.
First, to obtain the latest plugin version, click here to download the ZIP file.
Next, in your WordPress control panel, navigate to the Plugins page and click Upload. Navigate to your local download directory and select the edgio.zip file for upload.
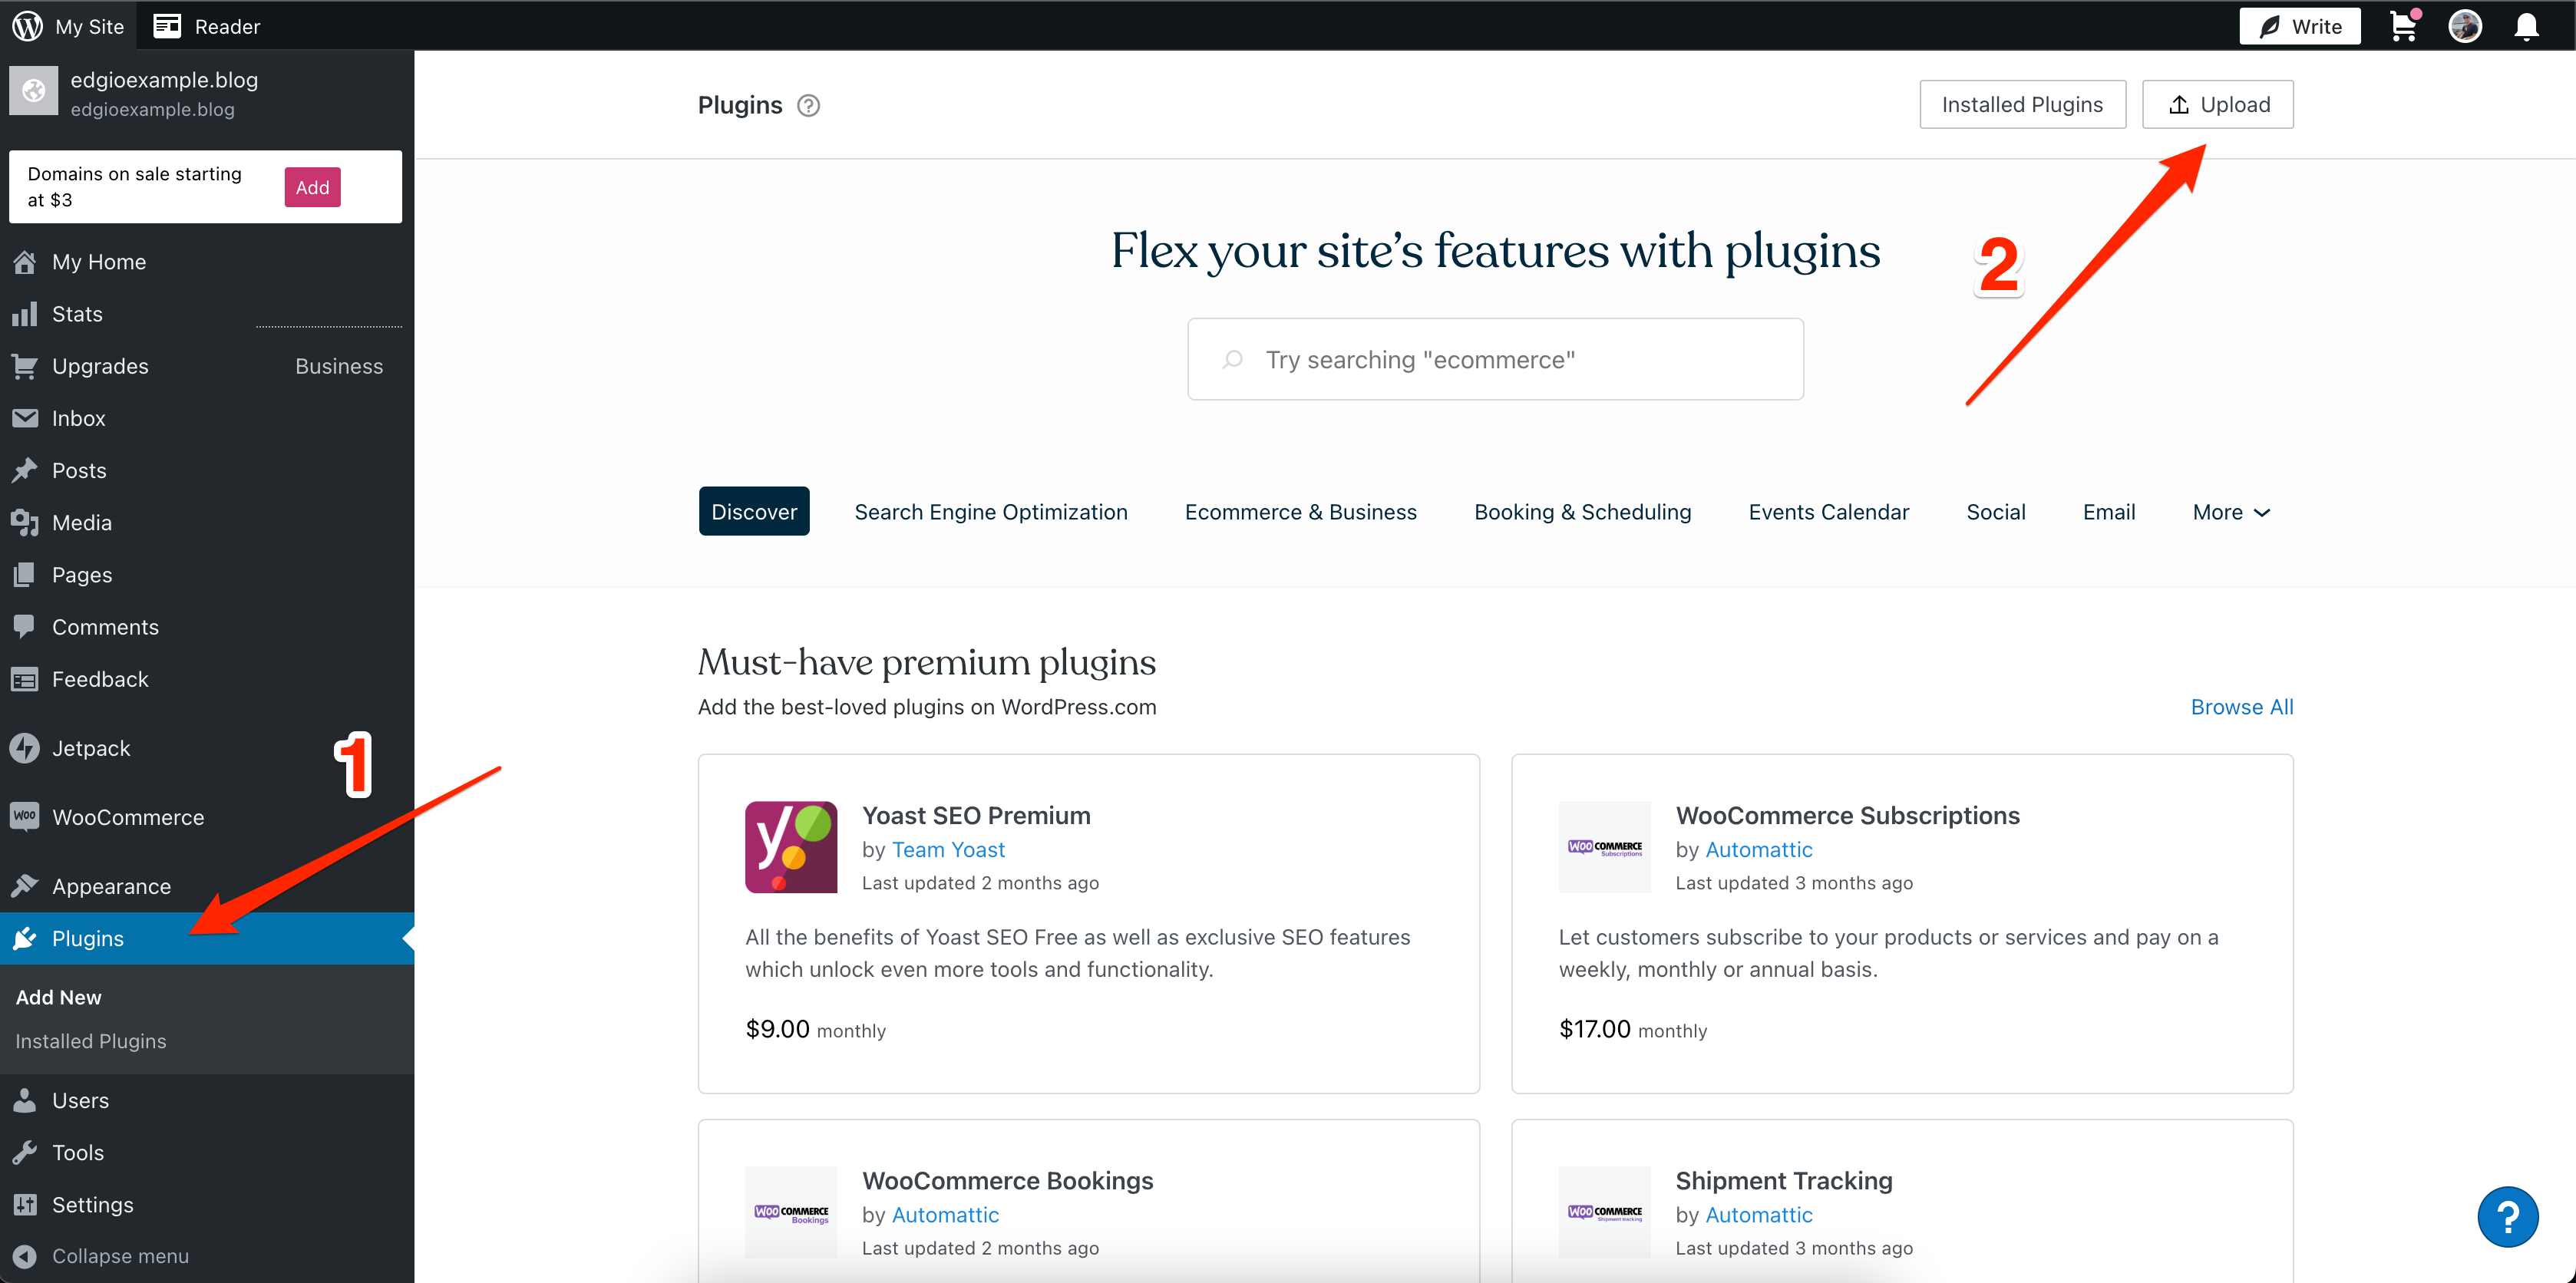
Once the plugin has been uploaded, click Manage Plugin.

Navigate to Settings > Edgio to pull up the form for the required information. You may see errors indicating that the Edgio plugin is missing information.
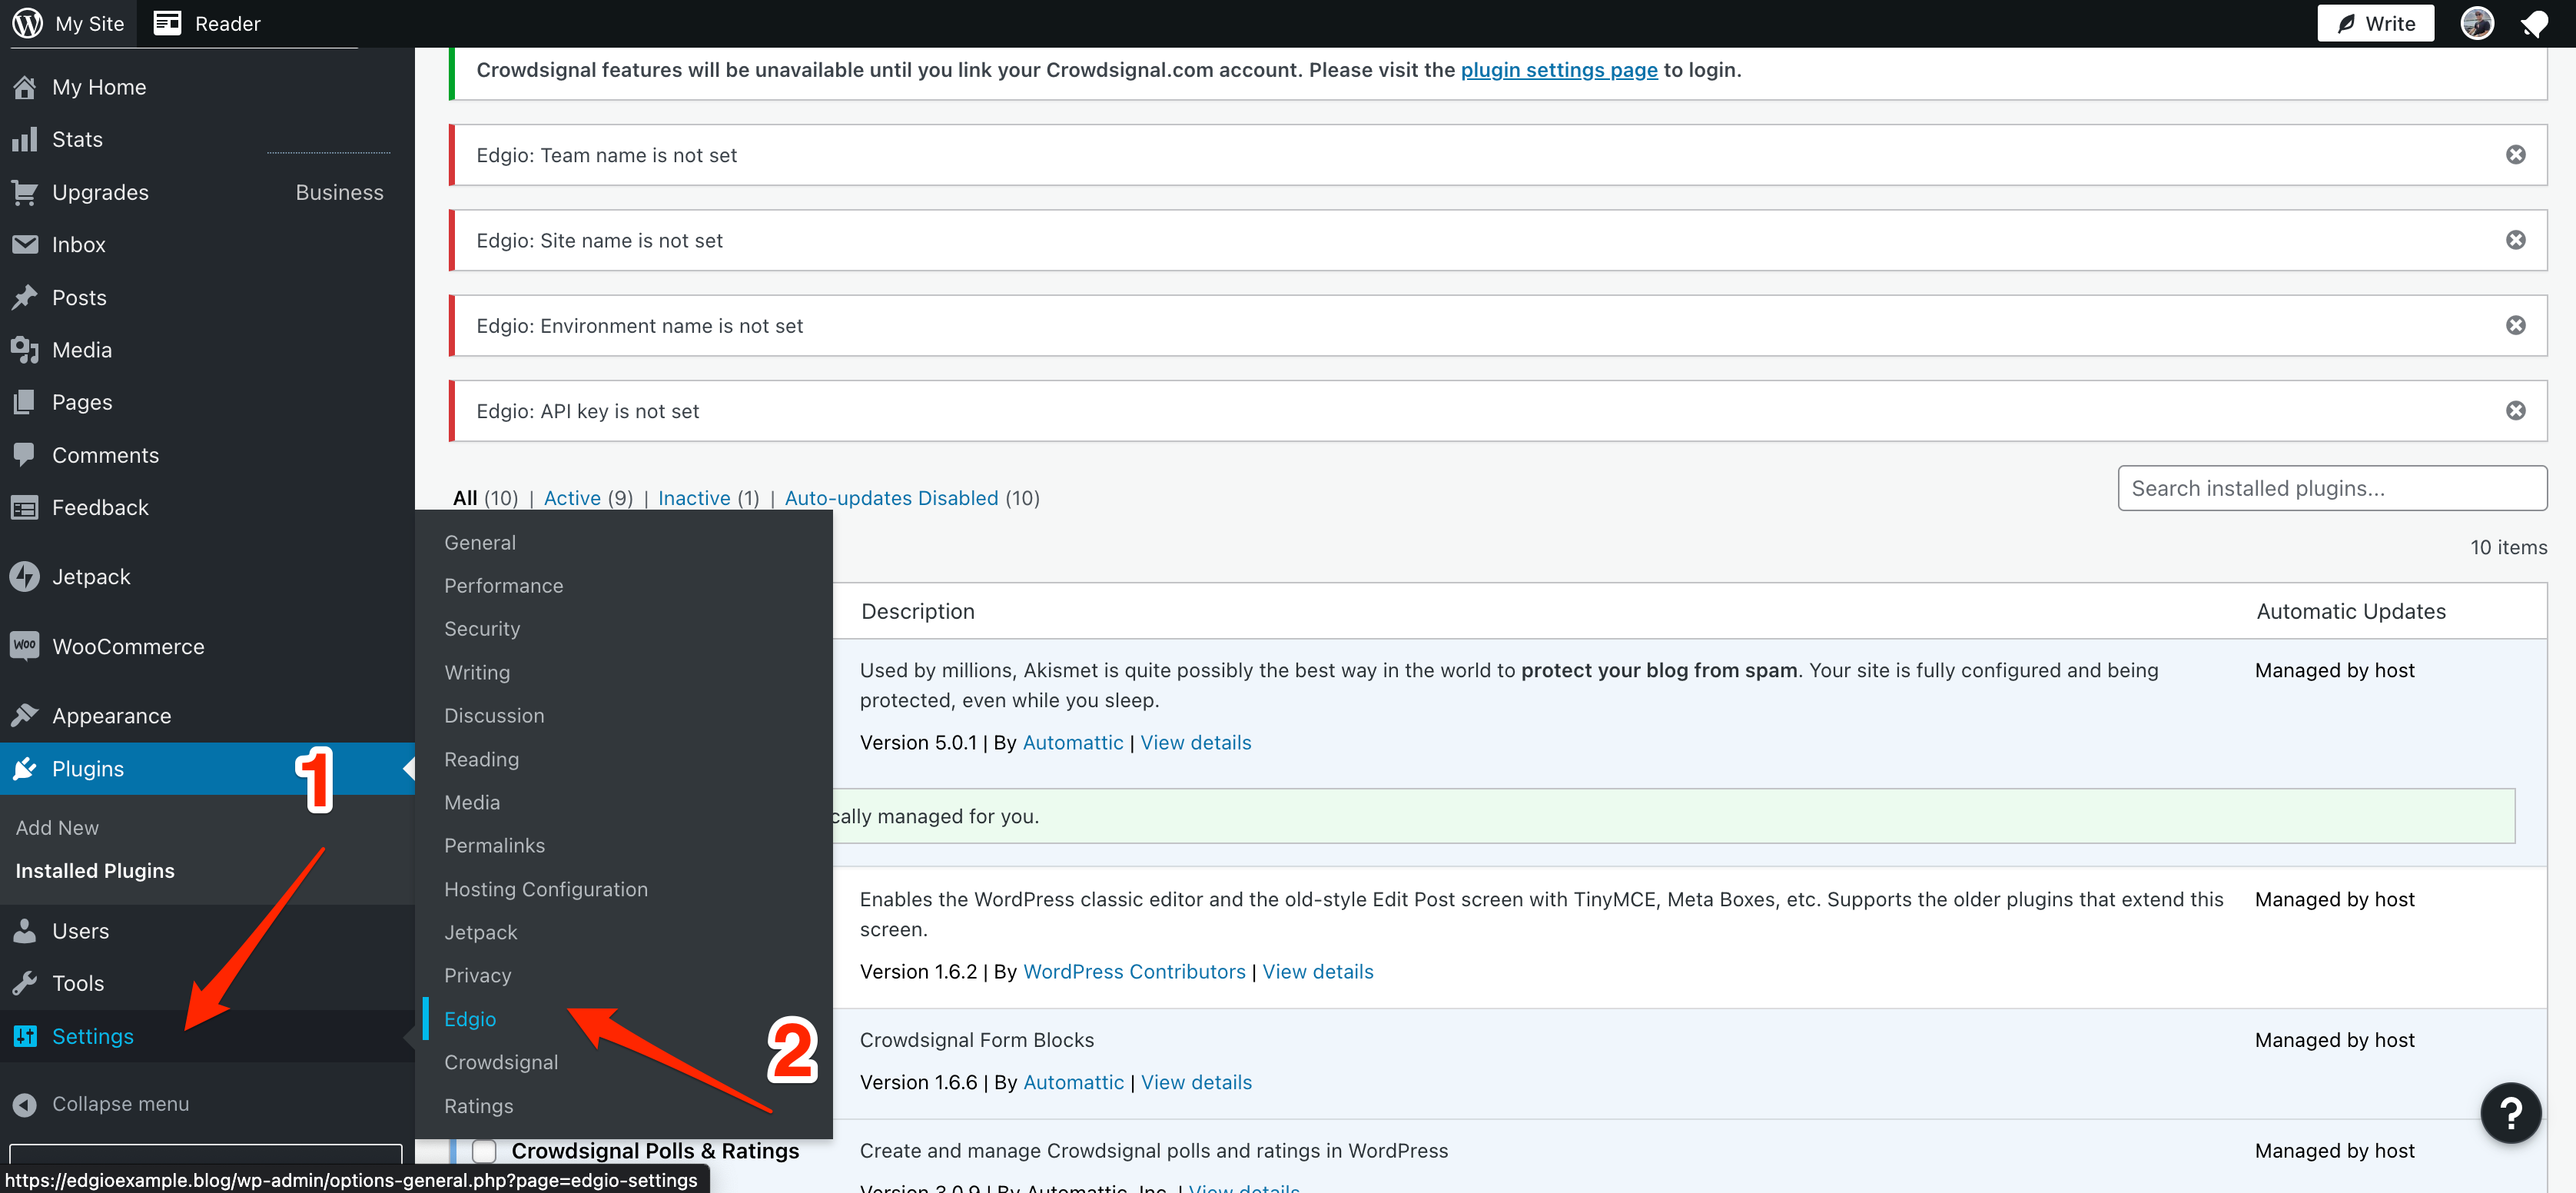
In order for the plugin to be able to interact with the Sites, you’ll need to provide the following:
- Environment Name
- API Key
- Browser Cache TTL (seconds)
- Edge Cache TTL (seconds)
- Cache Stale-While-Revalidate (seconds)
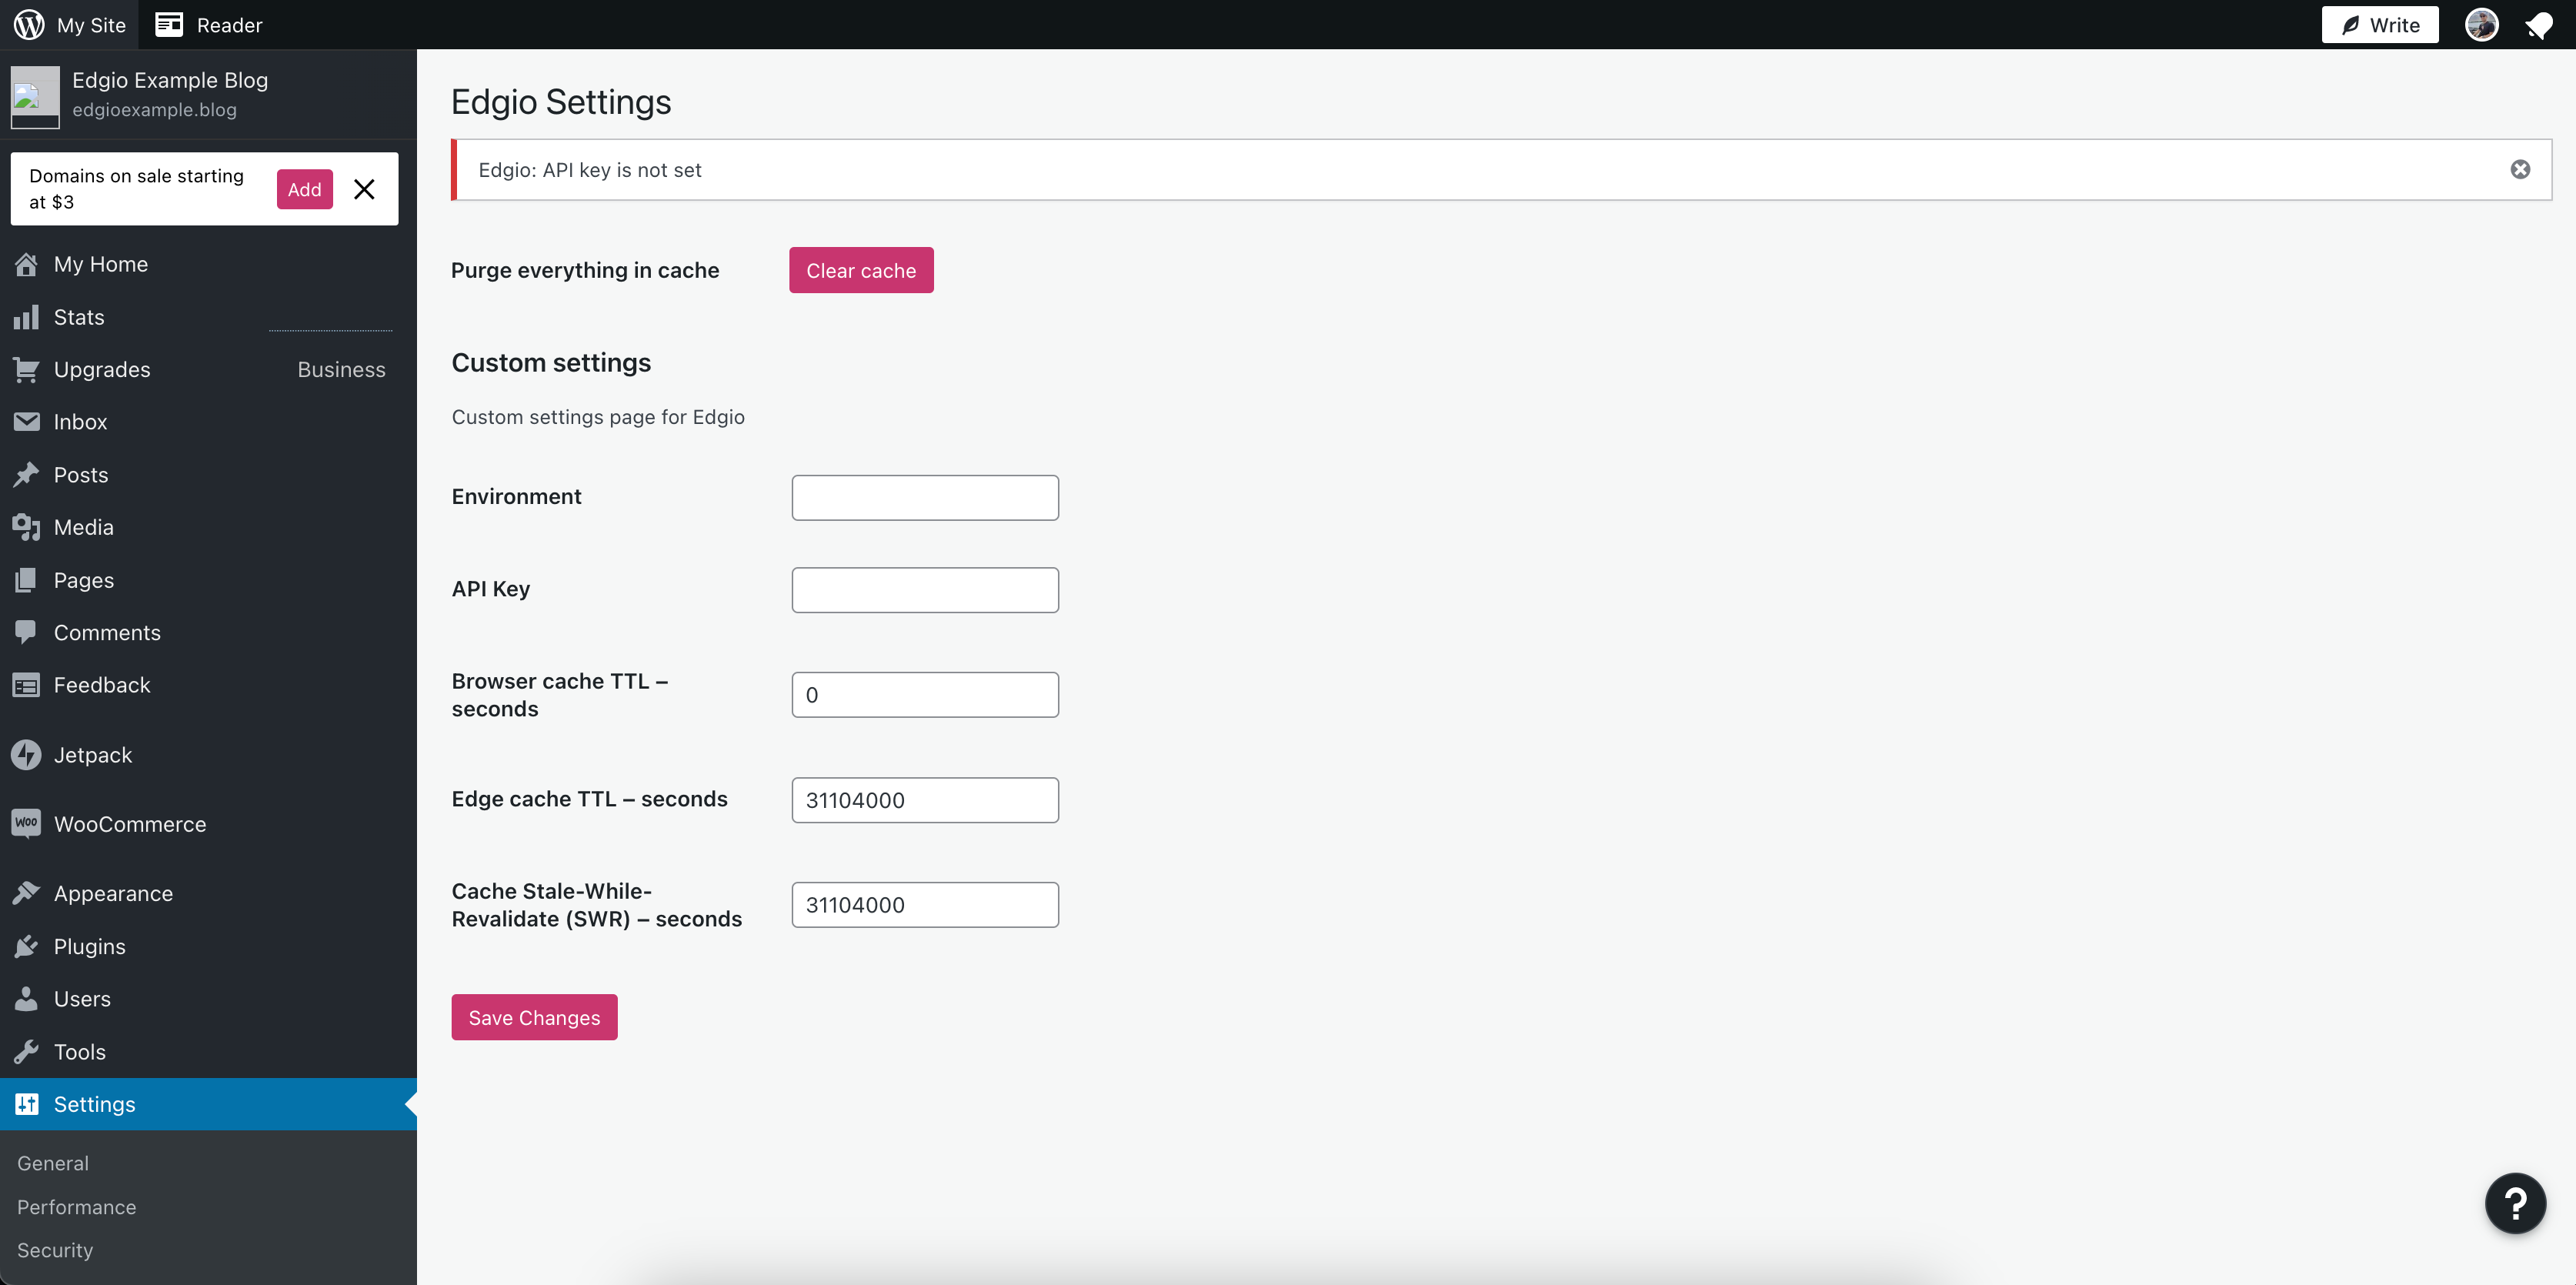
Environment Name refers to the Edgio environment as defined in the Developer Console for your site. This value will typically be default or production depending on how your site is setup, but can be any valid environment that you have created.
To obtain the API Key, go to your site within the Edgio Developer console. Click Settings > Create new Deploy Token and enter in a name for the token.
For information on the Browser Cache TTL, Edge Cache TTL, and Cache Stale-While-Revalidate fields, refer to the Caching guide.
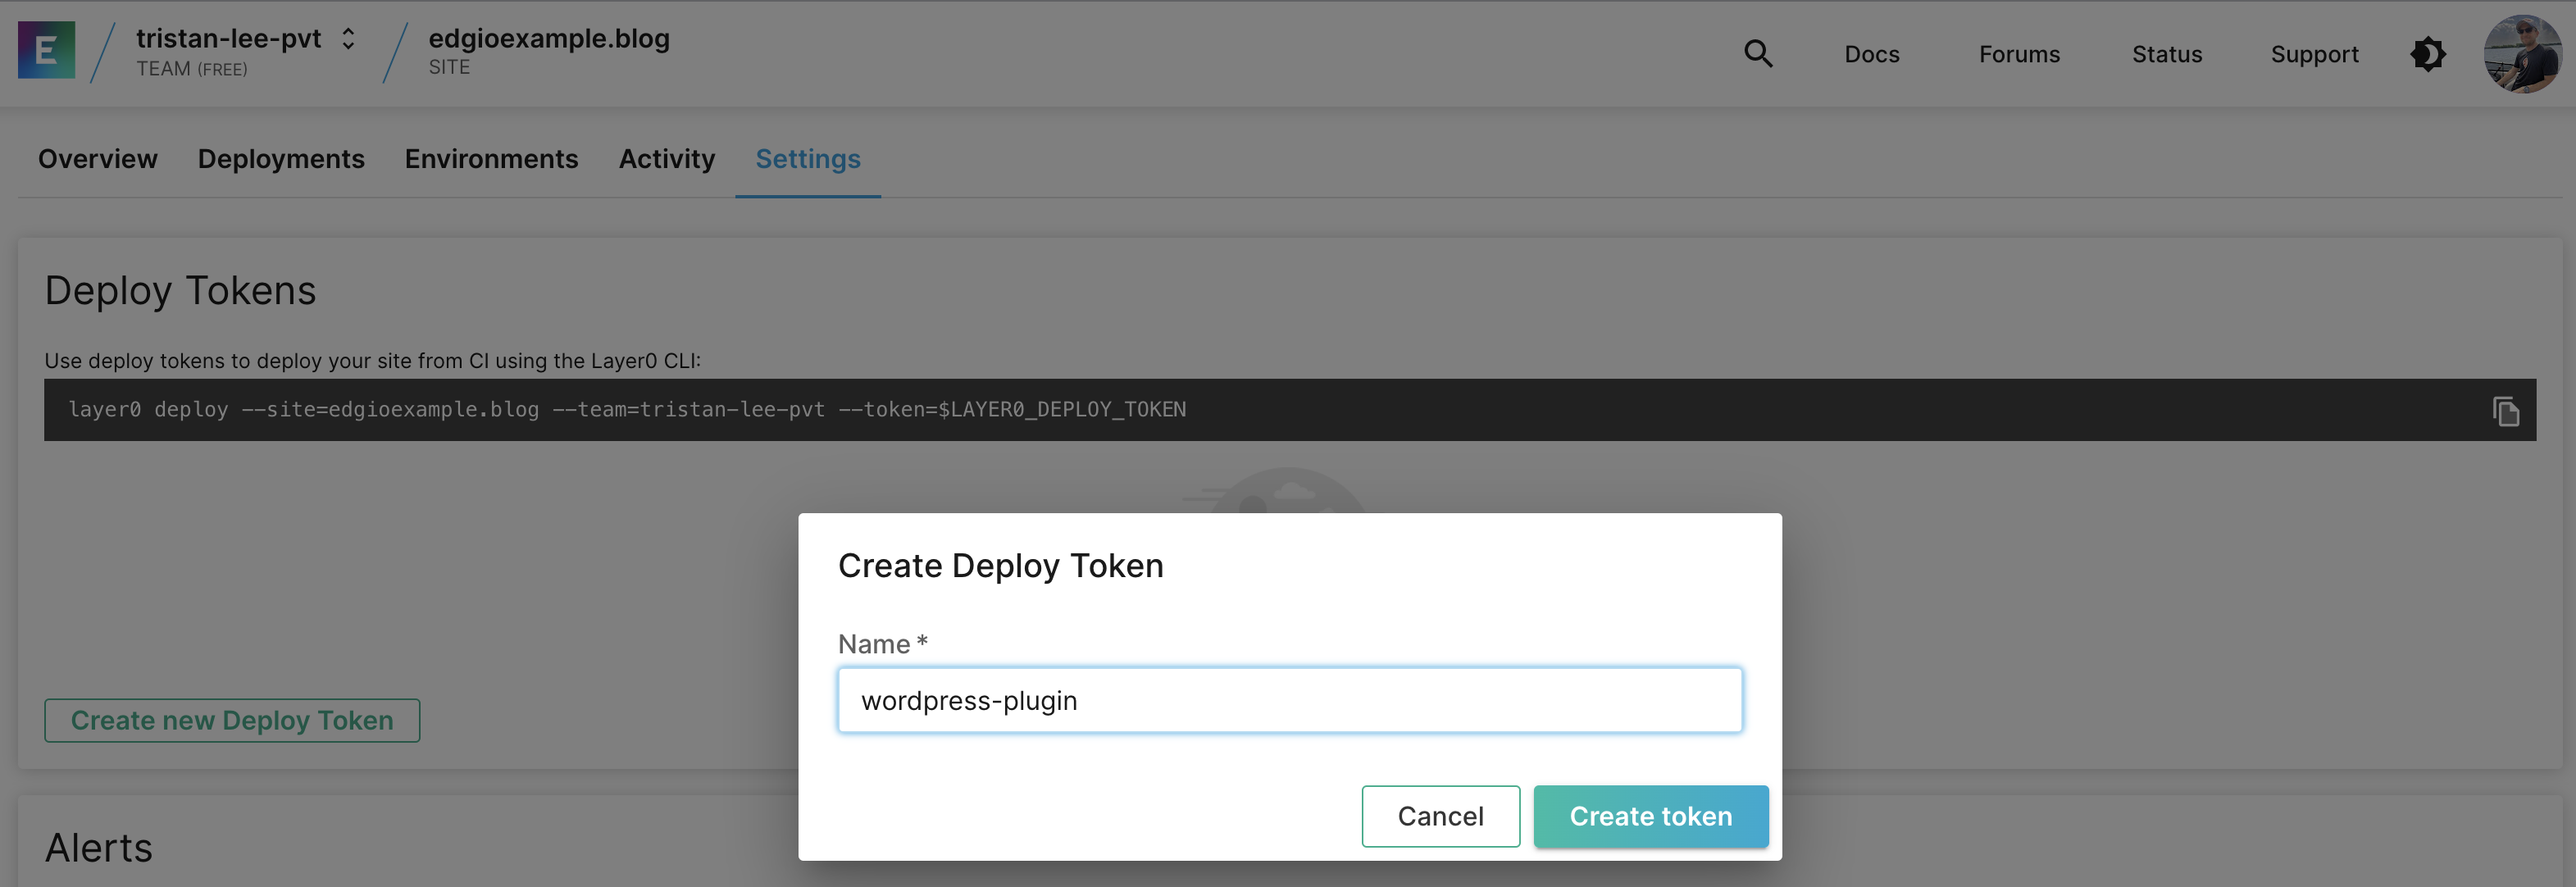
Once created, copy the token to the API Key field of the WordPress plugin. After you’ve completed all the fields, click Save Changes.
Lastly, test the behavior by clicking Clear Cache. You can validate the cache clearing was successful by checking the Activity tab of your site:
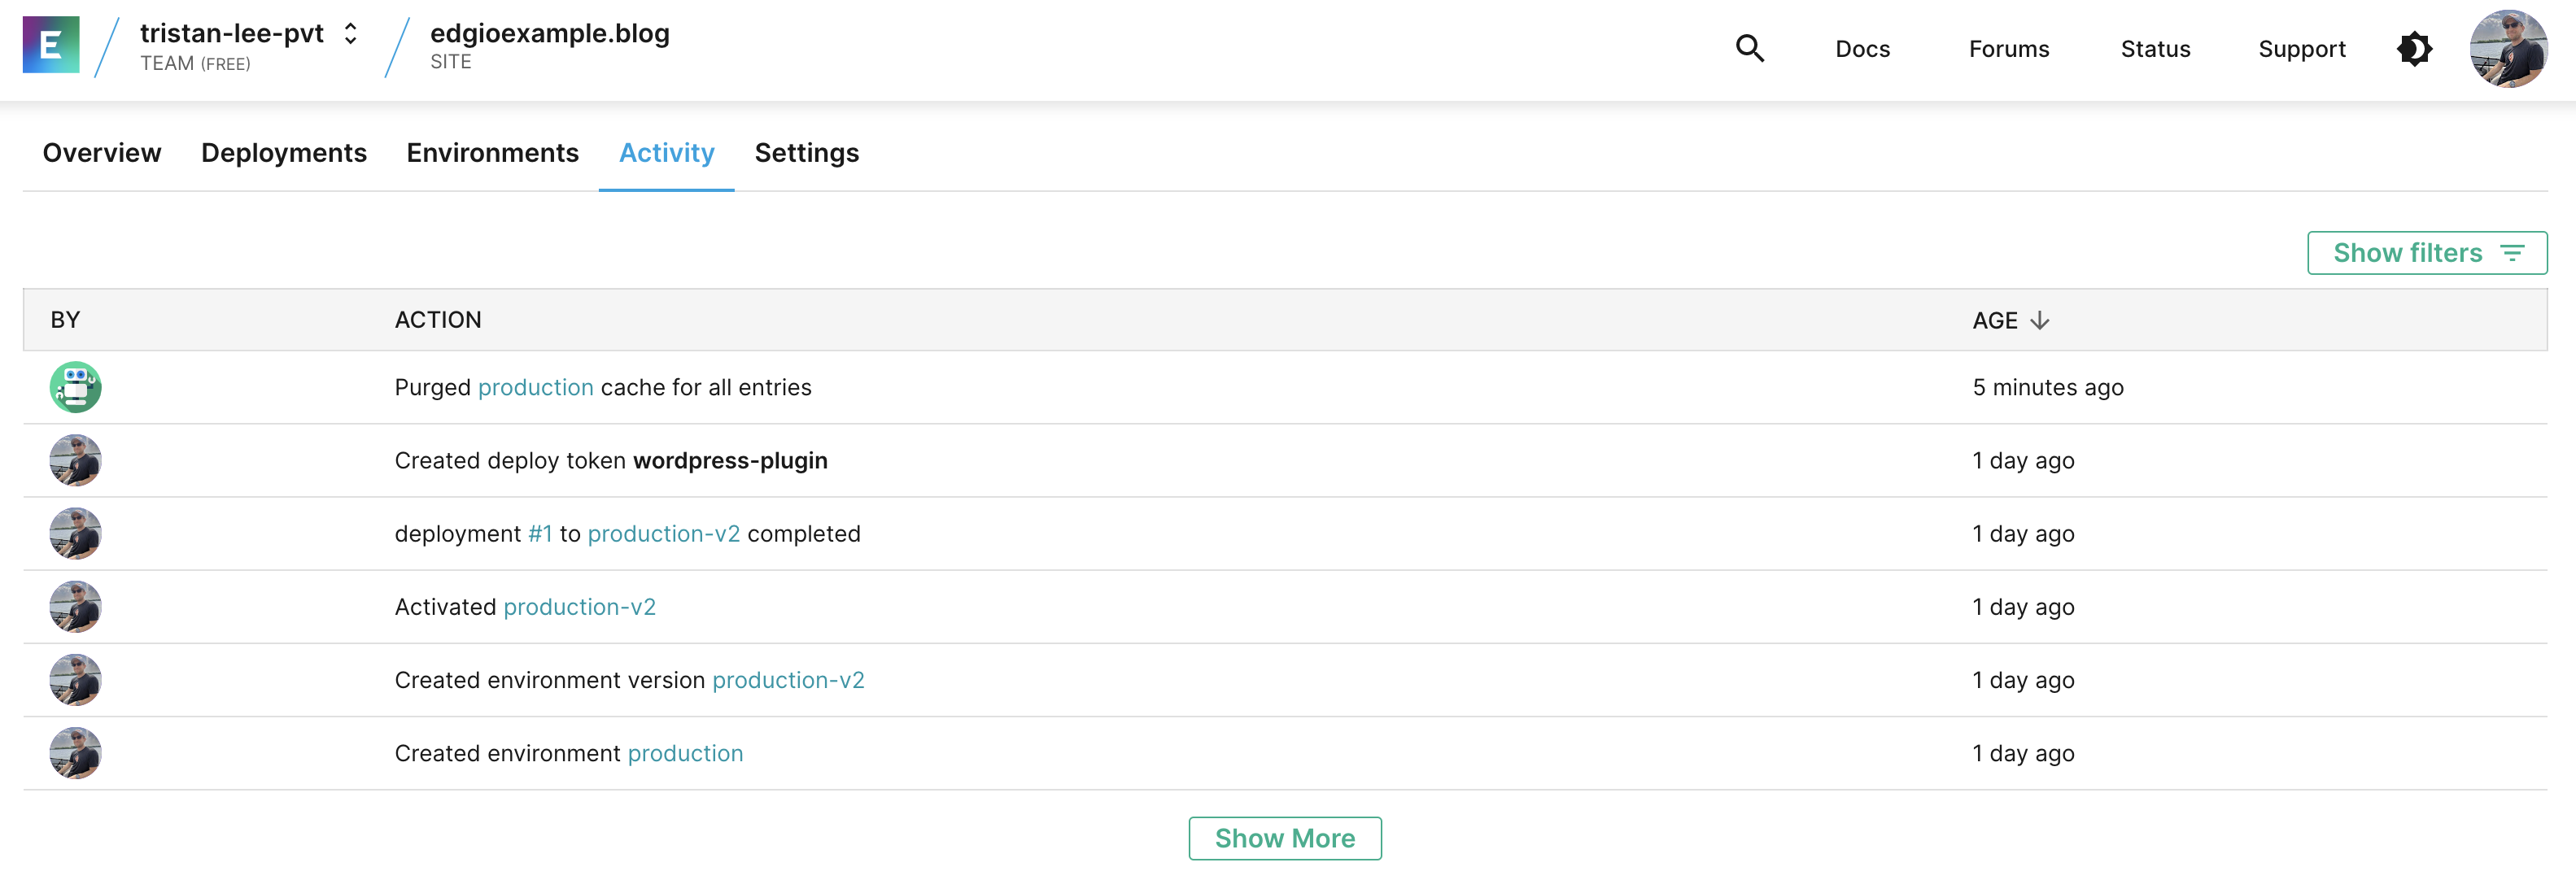
With Edgio, you never have to worry about outdated content. Whenever you make updates to a page on your WordPress site, our plugin automatically clears the cache for the changed page. This ensures that your viewers will always have access to the most up-to-date content. The Edgio plugin provides a seamless, efficient solution to keep your website’s content fresh and accessible to your audience, without any manual intervention required.